前提准备
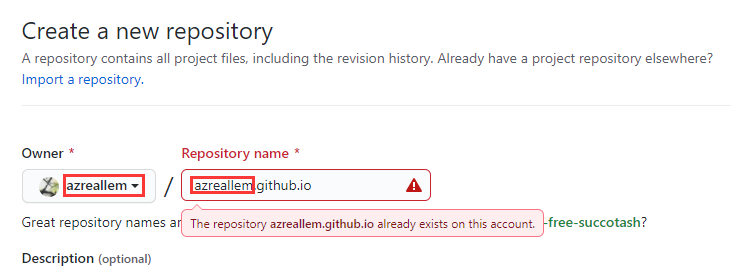
在github中新建一个名为username.github.io的仓库
安装node.js
进入Node官网,安装node.js,打开cmd输入以下命令行:
1 | # 验证版本信息 |
配置hexo
1 | hexo init # 该命令完成hexo在本地博客目录的初始化 |
配置GitHub
配置站点配置文件
hexo 有2种 _config.yml文件,一个是根目录下的全局的 _config.yml,一个是各个主题 theme 下的 _config.yml。将前者称为站点配置文件, 后者称为主题配置文件。
打开根目录下站点配置文件 _config.yml,配置有关 deploy 的部分:

部署到Github
1 | npm install hexo-deployer-git --save # 安装部署插件 |
网址: https://azreallem.github.io/ 能够正常访问即部署成功。
Hexo博客基本配置
更改主题
https://github.com/theme-next/hexo-theme-next
1 | git clone https://github.com/theme-next/hexo-theme-next themes/next |
启用主题,打开站点配置文件 _config.yml, 找到 theme 字段,并更改为 next,如下:

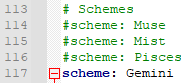
打开主题配置文件:themes\next_config.yml,找到 scheme 字段,并更改为 Gemini,如下:
上传到github
1 | hexo clean # 清除缓存 |
其他主题
https://github.com/Candinya/Kratos-Rebirth/
1 | git clone [https://github.com/Candinya/Kratos-Rebirth/](https://github.com/Candinya/Kratos-Rebirth/) themes/kratos-rebirth |
hexo常用命令
1 | hexo new “postName” # 新建文章 |
参考教程
https://mumaxu.github.io/2018/12/09/GitHub-Hexo-从零开始搭建个人博客/
https://candinya.com/posts/Kratos-Rebirth-Manual/#Top-Menu-顶部导航栏相关